Showing posts with label tutorial. Show all posts

Sunday, February 4, 2018

Valentines Day quilts #2

As I was typing up my post about my best friends Valentines quilts, I started thinking about how we both purchase fabric at the same time that year.  I purchased a couple panels, a charm pack and a couple yards of fabric for backing and binding.  My panels also sat in a pile of unfinished projects for many years.  As I was pulling out my Valentines quilts this year to decorate, I was realizing that it is one of my largest collection of quilts.  Christmas, Fall, Halloween and the 4th of July certainly compare in the sheer volume of fabrics that are fun to buy, sew with and finished projects.  But, I think I secretly love Valentines Day the most.  Why?  Because I love bright colors.  Anything pink as well.  I am a sucker for pink.  When my husband and I were first married, I wore mostly pink.  I have tamed down so much now that I usually wear black or white with an under color.  Life just changes a person I guess.

Here are a few of the panels that I put up that I just love.  Sandy Gervais did a lot of the fabric lines that I got these panels from.  At the time it was a cheap, easy way to get a quilt up.  I now prefer actually sewing and piecing a quilt even if it means that I have a month during the year that is not as full in my quilt area as other months.


I seriously love the fabric on the edge of the 2nd panel.  I love the print, the color and how it really makes the two little love birds color just pop.


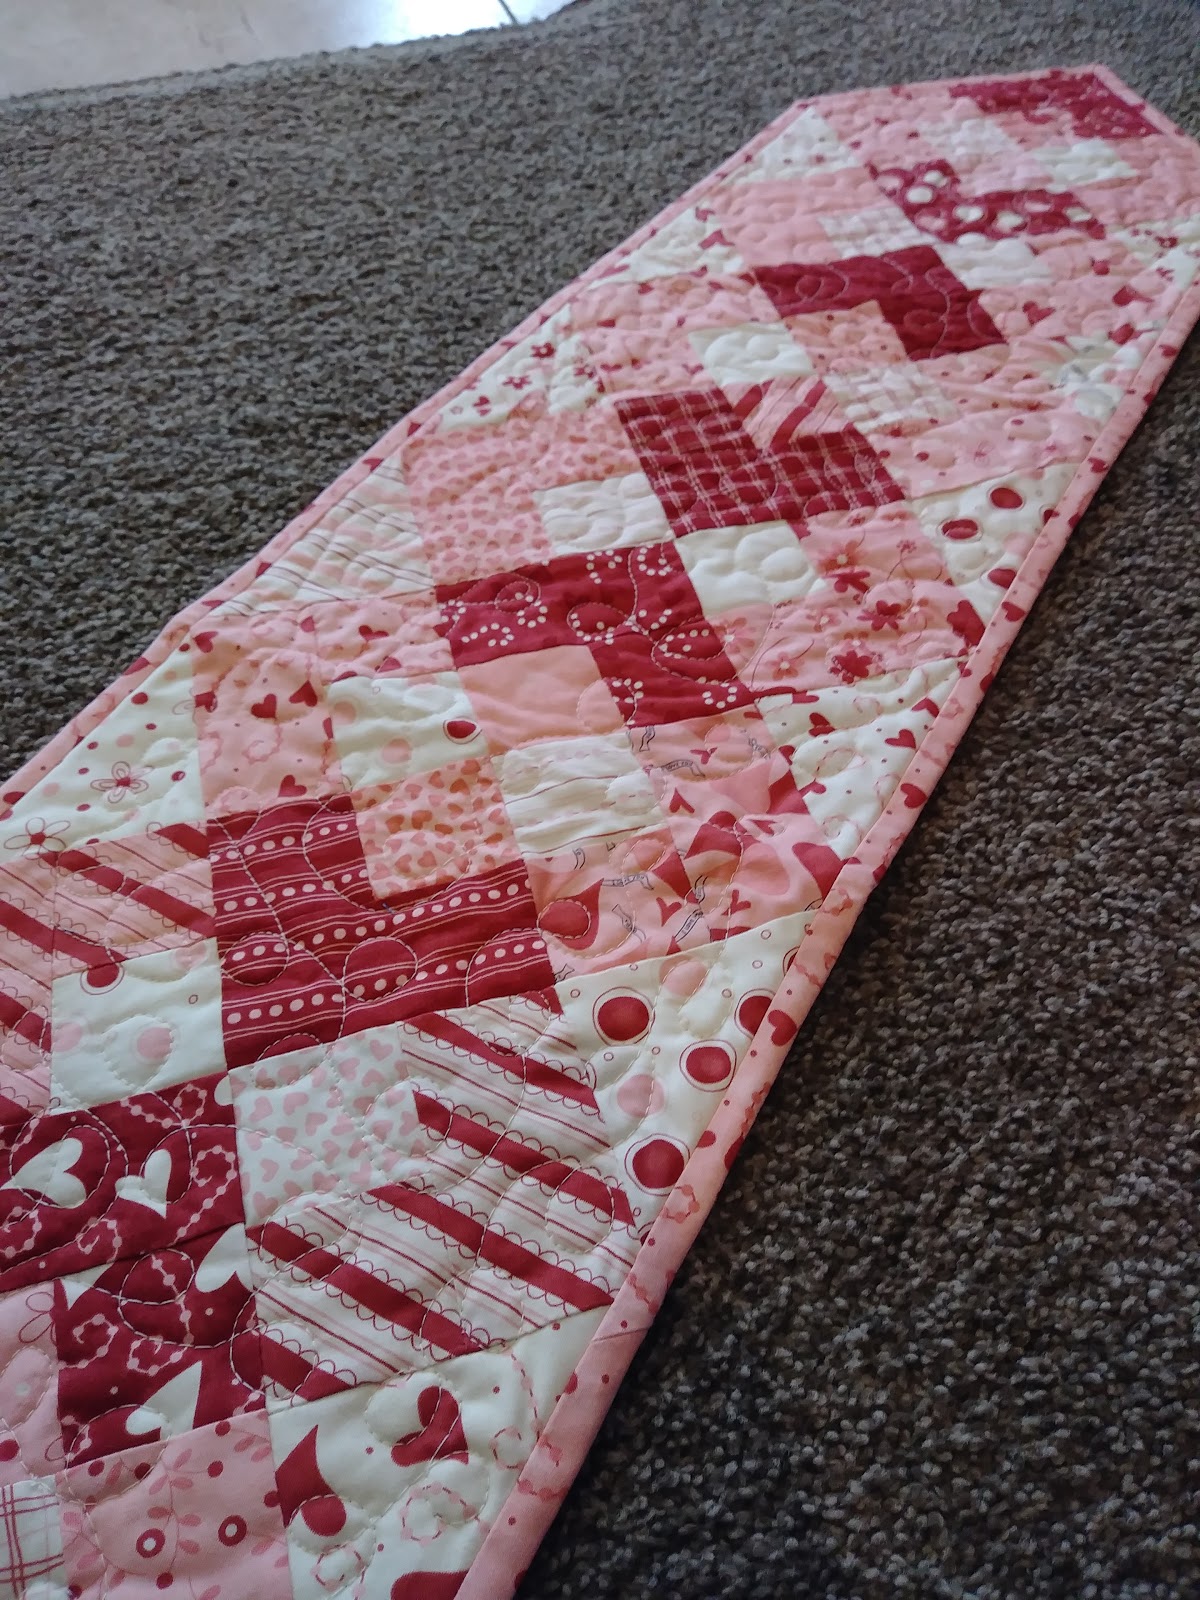
I started following canoeridgecreations on instagram a couple years ago.  I have loved watching all her posts.  She posted a free tutorial online that I immediately just grabbed right up and sewed up one day.  It is such a nice, little, easy to sew mini-quilt.  I used lots of scraps that I have.  (Mostly stuff from my daugher infant room that I swear I now know I bought 5x's too much fabric for but even with everything I make from it, the pile never gets smaller!!!)  This is absolutely one of my favorite quilts I have ever made.  I stipple stitched in the heard area and did a straight stitch through the white to finish off the machine quilting.


Picture taking is not my favorite thing.  I am not that good at it.  The lighting is often off and the pictures are often crooked.  Sorry.  These posts are a journal for me, so while I take plenty of time to create what I love, I spend...not as much time on the picture taking. Haha!!

Many years ago I started making a long table runner to my piano to put underneath all the stuff I keep on there to teach piano.  I now have one for every month and it is soooo fun!!!  Then I started making a few table runner's for fun because they are so easy and quick to pull together and finish.  I put the second posted on my kids books bookshelf.  I made the first table runner the a Sandy Gervais line of fabric.  The second one I made from the fabric I decorated my daughters infant room with.


Do you see my chatbooks??  When I realized in 2016 that I couldn't keep up with this blog let alone a blog about my family and their lives, I knew that I needed to do something that would help me keep up with journaling.  It is important to me that I keep track of our lives in some fashion.  It helps give me a sense of purpose.  Honestly, chatbooks are so incredibly cheap and easy.  When I either add up to 60 photos manually or through my instagram account, it automatically prints.  I have 3 days to check it out and make sure that the cover photo is what I want and edit pages I might want to take out or keep.  My kids LOVE reading them.  I find them all over the living room as they relive moments in their lives.  Best decision I made in a long time.  If you haven't hear of them, check them out.

Back to the post at hand, not only do I have quilts to hang, table runner to lay across things in my home, but Valentine's Day was the second holiday I really created pillow covers for.  Back in 2014, I posted a post about a dresden Christmas Quilt I was making.  I am shortly going to post a finished picture of that quilt, but I absolutely love dresdens!!!  But they just take so long to cut and iron on that I decided that I couldn't handle making a full quilt of them for Valentines Day.  So, I made a 16in pillow cover with a dresden.  Of all the pillow covers I have made it is definitely my 3rd favorite.  (Wait until you see my new Halloween one late next week!!!  Oh, and my fall one...or my embroidered/quilted spring one.  Yep, I can't wait to post the millions of pillow covers I made this Christmas.)  As it was actually the first dresden I ever completed, I take a lot of pride in it...even if the middle circle was a complete fisco and not a real circle anymore when you look closely.


I have been collecting red fabrics with gorgeous prints for many many years.  I have yet to make a fun quilt with them, but I did make this pillow cover three times for 2 other people and myself this past Christmas and I just love this one!!  I didn't use a white background to applique it on, I used a muslin. I think it just made it have such a warm color that I wonder why I use white so much.


Whoo blurry!!!  I will try and take a better picture of this pillow cover soon.  This was a leftover block from my pieced-block-panel quilt.  Not my favorite at all, but worth a mention.


Ya, clearly this pillow cover is not on a 12in pillow form.  But I couldn't find my other 12in pillow form so I put it on the 10in until the other one reappears.


Couple all those with the two I made a long time ago....

and I am near complete with my Valentines Quilts.  You can find the last two here and here in other posts in the blog before.  True to form, now you can finally see a finished project because in the original post it was just the top.  These were both some of my first experiments doing machine quilting on my domestic machine.  But the chocolate/pink quilt was my first quilt quilted with a darning foot.  I will never go back to taking everything to a long arm quilter.  It is so much fun to do it myself.  I have the intention this year of branching out and perfecting some more stitches because I default to the stipple stitch nearly everytime.  

And to say thanks for reading, here is the bottom of one of the panel quilts made into it's own mini-quilt!!


Hope you enjoyed!!

Monday, November 17, 2014

Infant/Toddler easy 20 minute ties

In my personal opinion, if you want a boy to wear a tie to church later on, you have to start when they are born.  That way, even though they are not comfortable, they are simply used to it.  My second personal opinion...is I don't really care for bow ties.  Yes, they are cute on some boys, but they are just wrong on adults and therefore I personally don't want to start a trend that he might like later on.  Like it said, personal opinion.

As I was getting my son dressed for church yesterday morning I realized that he was in need of a new tie.  The ones that I made him a year ago are just getting to short.  I used this tutorial that I had pinned when I made them.  They have been wonderful.  I made a white strap to go with all the ties and you can never see it under the collar.
The ones of the left are just folded in half.  The green strap was my first
attempt for a wedding a couple years ago.  The white strap is attached.
The ones on the right are layed out so you can see how long they are.
When dried the red one shrank, so keep that possibility in mind.  
My husband really wants to have some matching ties for he and Remington.  It is sad that I bought the fabric for matching ties last Christmas and never finished them.  I bought some Hawaiian prints for the next ties and Russ is going to love that.  I guess I better get started on those so they have ones to match this year.

Hope you enjoyed.

Saturday, November 15, 2014

Christmas Dresden

I have wanted to make a dresden quilt forever!!!  Seriously.  I have pinned more dresden quilts than any other kind of quilt.  About a year ago I bought one of those easy dresden acrylic templates.  After reading several tutorials over the past few weeks, I also watched this youtube tutorial by the Missouri Star Quilt Company.  http://youtu.be/lcy_p4pryE4

Anyways, this is a short post because I have to go get the kids out of bed and to the babysitter this morning before I head to work.  I decided it was time to try on of these quilts last night.  Soooooo, about 9:30pm I got out my Christmas Fabric.  Yes, I always sew really late.  It is the only time I have.  I ironed, picked out fabric, reviewed the tutorial, cut a 5 inch strip of fabric from 6 different fabrics and got going.  The chain sewing of each individual piece certainly made the sewing of 100 different blades go super fast.  At 10:15 I was ready to iron all those pieces which took about 20 minutes by the time I turned each one of them out.  I sewed one block together and ironed.  I pull out some white fabric to lie it on and here we are!!!!


I didnt' find my instructions sheet until later last night.  It has the template for the middle circle.  Mine turned out a 1/4 in bigger than the template.  Do you think it looks too big on the block?  I already whip stitched it to the block, but that only took 2 minutes so it is easy to pull off if i want to change it.  Whatever i decided on this one, I would follow on the other blocks.  I am planning on a small 4 block quilt.  I am also going to cut a set of smaller blades to make one Christmas quilt pillow cover like this.  Now, that will be super super cute!!!  I am so excited.  Now that I look at the picture again I wonder whether I should pull the center off all together and make it white.  I think I have enough of the fabric I used for the center circle to make the border for my quilt. That would be beautiful.  I want it to pop and when I look at the previous picture and this one the middle pops more when there isn't anything in there.  I really like that I chose the white background.  I was going to choose and off white fabric to match the tons of all the pieces in the block, but I love the white.

At the end of each night...that moment when all I want to do is go hop in bed, I always make sure to put away my rotary cutter and my scissors.  A curious 4 1/2 yr old is certain to hurt herself if she wakes up early and I leave them around.  I either lock them in my sewing box or put them on the top of my fridge.  Safety is a priority as a mother and I am always checking the kitchen to see what they could get into.  I have to mention that this is the child that would always find the one cleaner I left out when she was a young toddler.  Sadly, her dad taught her how to spray a water bottle when she was super little.  I called poison control many, MANY times when she was a toddler.  They are the most amazing people ever!!!  They are there to make sure that you and your child are fine and they often call for follow ups.  I like them more than my actual doctor sometimes and I love our pediatrician.

Anyways, random...Hope you enjoyed.

Thursday, November 13, 2014

Purple Quilt--finished, new table runner

Remember this post?  Well, that quilt top got put away for three years.  I finally pulled it out and quilted it in Feb this year.  Then, I displayed it...even though I couldn't decide on a binding.  Because I am in a sewing stage where I am not allowed to buy any fabric, I finally just used the white and purple dotted fabric for binding.  I really like it, except that it blends in at the top and bottom.  I would have preferred a darker purple fabric, but I didn't have enough of any one fabric and I prefer binding to be all one fabric.

Well, here is a finished look.


Last year for Russ aunt birthday, I made her a table runner for her home.  Well, of course I knew that I would love it, so I bought enough fabric to make me one as well.  I finished both tops and got her done and gifted.  However, I never got to quilting or binding mine.  I have this ability to tell myself I can't work on anything new until the old is finished.  Before I started working on all my Halloween quilts, I finished this table runner.  I can't wait to put it up this next Spring.  Table runners are just so fun to make.  I can easily make a top, quilt it and bind it in a matter of a couple hours.

Hope you enjoyed.

Monday, November 10, 2014

Pillow Cases

Yesterday, my son had a bad nap.  He never went to sleep and eventually when he had a messy diaper, he pulled it off in his bed.  Nasty, I know!!!  At least he just left it alone, but unfortunately he sat on his ladybug stuffed animal pillow.  Yep, it just went in the trash.  After sleeping with two kids over 3 1/2 yrs it was just time.  I simply didn't want to try and clean it.  So, he got a big boy pillow last night.  I was really sad.  It just means that he is growing up.   I have had some fun bug printed fabric in my stash for quite some time.  I bought the ends of some rolls in a clearance section about 7 years ago hoping to make some baby blankets from them for my etsy shop.  That...never happened.  So I followed this Tutorial by Missouri Star Quilt Co.  It is super easy and super quick.  Each one only took 15 minutes from cutting, pinning to sewing.  I left out the 2 inch lip because a little boys pillow case doesn't need it.  I took me probably twice that long to just pick out the fabric in my storage room.  The two on the left are my son's.  The two on the right are my daughters.  She will get hers for Christmas.


Hope you enojoyed.

Saturday, November 8, 2014

Halloween quilts

Ok, I has been a LONG LONG time since I have posted on my blog.  Raising kids and working 40-60 hours a week is no small job.  However, that doesn't mean that I haven't been sewing or quilting.  I am going to have to post pictures each month as I put up new quilts to post all the ones I have made since we moved into our current home.  Today's post is all about Halloween.  Pictures of all the quilts that I finished before I put them away for another year.

If you want to see the list of quilts/pillows I looked through and turtorials I found come over and follow my Halloween and Fall Quilted Embellishments board on pinterest.  I have already started making some of the Fall stuff and can't wait to finish them.

Remember Jack the pumpkin?  It is the quilt that is sitting on the rocker behind the pillows.  Sandy Gervais made this line of fabric and the pattern.  I made the three pillow covers this month.  LOVE THEM!!!  I have had those three pillow forms just sitting in my quilt cupboard for years.  I have always wanted three pillows that are specific to decorate with for each  month.  Well, I got 1 of 12 months done.  I am hoping, really hoping to get some fall pillow covers done this month.
I made my own pattern for the witches hat.  I simply cut pieces of fabric in random ways and sewed them together and applied it with steam a seam 2.  I just used a zig zag stitch to make the spider web in the top left corner.  While I was not really excited about the green fabric.  However, this years goal was to use only fabric in my stash to finish projects and put backing on them.  When my grandma died I got most of her fabric and she had a ton of solid colored fabric.  I think that I will be using much of that for pillow covers.  The Happy Halloween came from a panel of fabric that you will see near the bottom.  For the Oct. 31 pillow, I used my cricut machine to cut the letters/numbers using the Happy Hauntings font.  I applied them with heat and bond and stitched around the edges.  When i started this project I finally unboxed all my fabric from our last move.  I found the orange spider web fabric and I am so glad I did.  It is by far my favorite fabric I worked with this year.    
The work in progress.  It always take me time to decide on the embellishments


When I bought the charm squares to make Jack 4 years ago, I bought four packs.  I made this table runner based of a free pattern I found...and loved!!!  Super easy.  I have a second set cut out.  I just have to sew the blocks together.  That will unfortunately have to wait until next year.
I put borders on this Halloween panel I bought at Hobby Lobby 2 years ago.  The binding: jeans.  I made a Levi quilt many years ago for my sister in law and made too much binding.  I have a stash of extra binding that I look through before finishing each quilt.  It was the perfect color and it will be plenty sturdy.  Haha.

I made this spider web table topper for myself.  Tutorial link.  I wish I had had enough fabric for making the entire quilt in the tutorial.  But, I like these small ones and the quilt I made below.  I finished whip stitching the spider web quilt....oh, today.


I made this one for a relative for her birthday.


The following are quilts I finished in prior years but i am not sure I ever posted pictures.  Yep, pretty much, I went through my fabric and finished every project that I meant to start in the past 4 years.

Add caption
This is the one that I hung up for viewing this year.  Loved it.  

Putting it away is probably my least favorite sight.  :(  However, there is always something fun to pull out which makes it so much better.
Sadly/happily I bought some new fabric for projects to work on next year.   I bought 4 panels and fabric for placemats and napkins.  I was hoping to make the stack of fabric smaller this year.  I truly did, and then it became the same size.

Hope you enjoyed.

Sunday, June 26, 2011

Homemade do it yourself bow maker

After doing some research a while ago on the internet and watching all sorts of bow making ideas with forks, bowdabra's and such, I saw an idea that made me excited. It seemed that people had done all sorts of things to get the width that they needed for a bow. I had my husband use his tools, some scraps from house projects and this is what he made. I love it! The only difference i would make is that we did it really fast late one night and the holes are not exactly straight up and down. As you will see that doesn't matter, but it would be nice.

Supplies needed:
Some kind of board I used a 2 by 4
Two dowels
Drill

Draw a straight line down the middle of the board. Measure two dots 2 inches away from each other. Then depending on how many bow sizes you would like to make you draw dots 1/2 in away from the original dots. These will make 2in, 2 1/2in, 3in bows etc. I have made holes for up to a 4in bow. Choose a drill bit the size of your dowel width and drill in the holes. This is what my board looks like

To make the bow you need the following supplies:
Ribbon for the bow (see the bottom of the post for lengths needed for each size bow)
Small 1/8in wide ribbon to tie
4 1/2 inches 3/8in grosgrain ribbon
Scissors
Lighter
Glue gun
Hair clip- alligator clip, or barrette

Here is a video demonstration making a 2 inch bow:

This is a video of me attaching a bow to the alligator clip. I unfortunately called my glue gun a heat gun during the video. Sorry, but know that I am using a glue gun.

Lengths of ribbon needed for each size bow:
2" bow: 11 1/2" ribbon
2 1/2" bow: 16 1/2" ribbon
3 " bow: 21 1/2" ribbon
3 1/2" bow: 26 1/2" ribbon
4" bow: 31 1/2" ribbon
just add five inches to each length for 1/2" size of bow.

Hope that you enjoyed.

Sunday, September 19, 2010

Halloween mania

Halloween has to be one of my favorite holidays. The fabrics and projects are amazing. I wish that I had money to spend right now to make many fun and wonderful projects. But, alas I must window shop all the cute ideas, put them in my bookmarks and hope for a later date. I saw some of the most fun fabrics at the Quilting Cottage yesterday. The oranges and purples had spiders and webs in the print. I liked that the print was not too big. I have been looking all over the internet for the company who makes the line, but apparently I should have written it down while I was in the store. I can't find it anywhere.

I was looking through the posts from blogs I follow and Crazy Old Ladies has started selling the following pattern on their etsy shop. I think that it would be super easy to make. The applique of the numbers would take a while, but it is really fun. I have been working on a countdown myself for the last year and when I finish one more block and give my mom her present I will post what I did. It is exciting after a year and a half to be finishing the one project that I meant to give her last christmas and didn't finish because of our moving and my morning sickness with my daughter.
I found this ladies blog...ps i quilt. She has all sorts of different things on there and this free tutorial.
And you can go through and look at several free tutorials on Free Quilt Patterns.info. It has a list of free tutorials and links to them. It is a great site.

Well, I would post more of the pictures, however, my house is calling and I have a sleeping baby. I better get cleaning before she wakes up.

Amalie